Welcome to our user guide section, where you can learn how to filter our learning resources to help you gain the most from your membership.
How to filter resources
If you are new to CharityWise and looking to get the most out of the resources available, this useful guide will show you how to filter the content to meet your individual learning needs.
Once you have chosen the topic area that you want to focus on, you can filter the resources to the skill level that you are currently working at (for instance, Foundation level) as well as choosing your preferred content format (such as Articles/Guides).
Once you have chosen the topic area that you want to focus on, you can filter the resources to the skill level that you are currently working at (for instance, Foundation level) as well as choosing your preferred content format (such as Articles/Guides).
Step 1 – Choose your learning topic
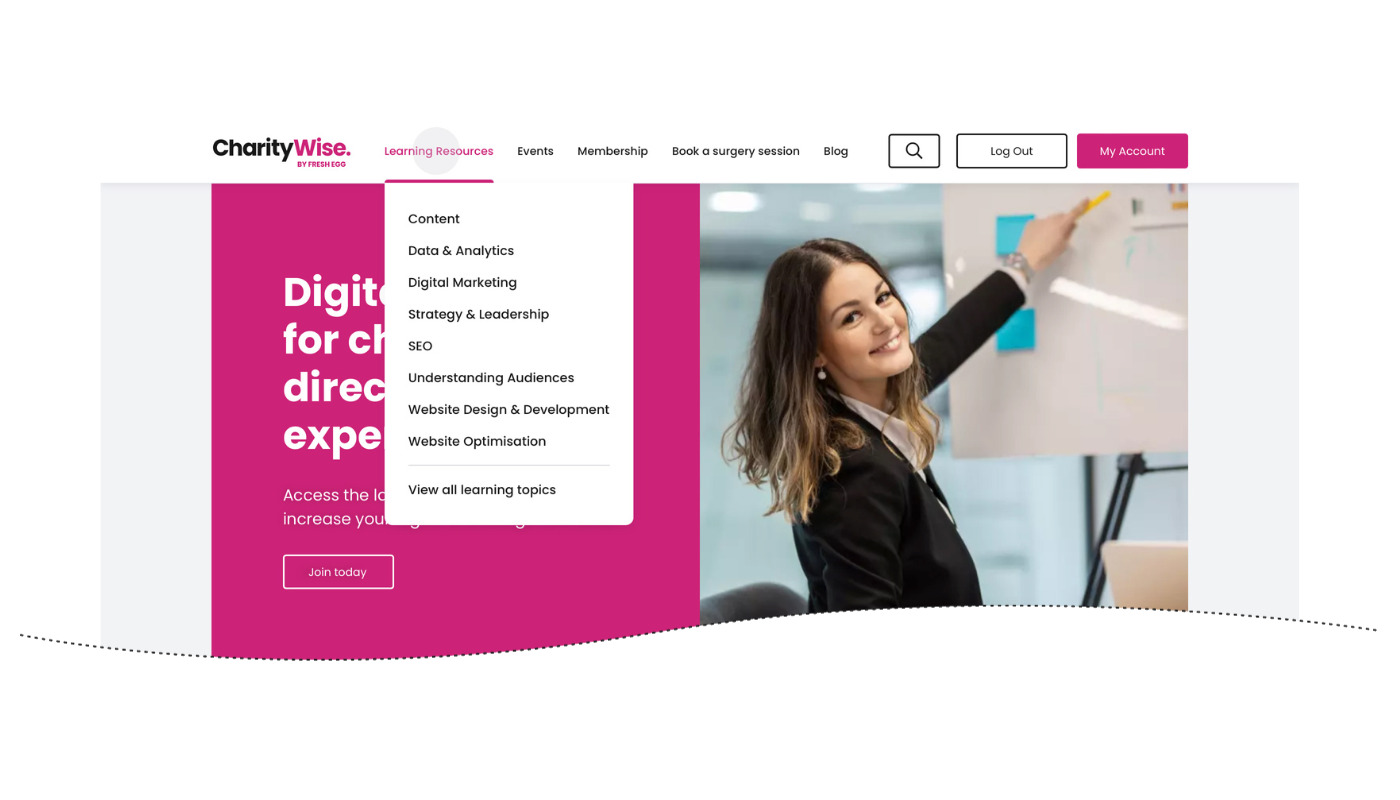
- On the main navigation menu at the top of the page, click on the ‘Learning Resources’ tab.
- Next, click on the topic area of your choice – for example, ‘Content’ (see image below).

Step 2 – Filtering by skill level
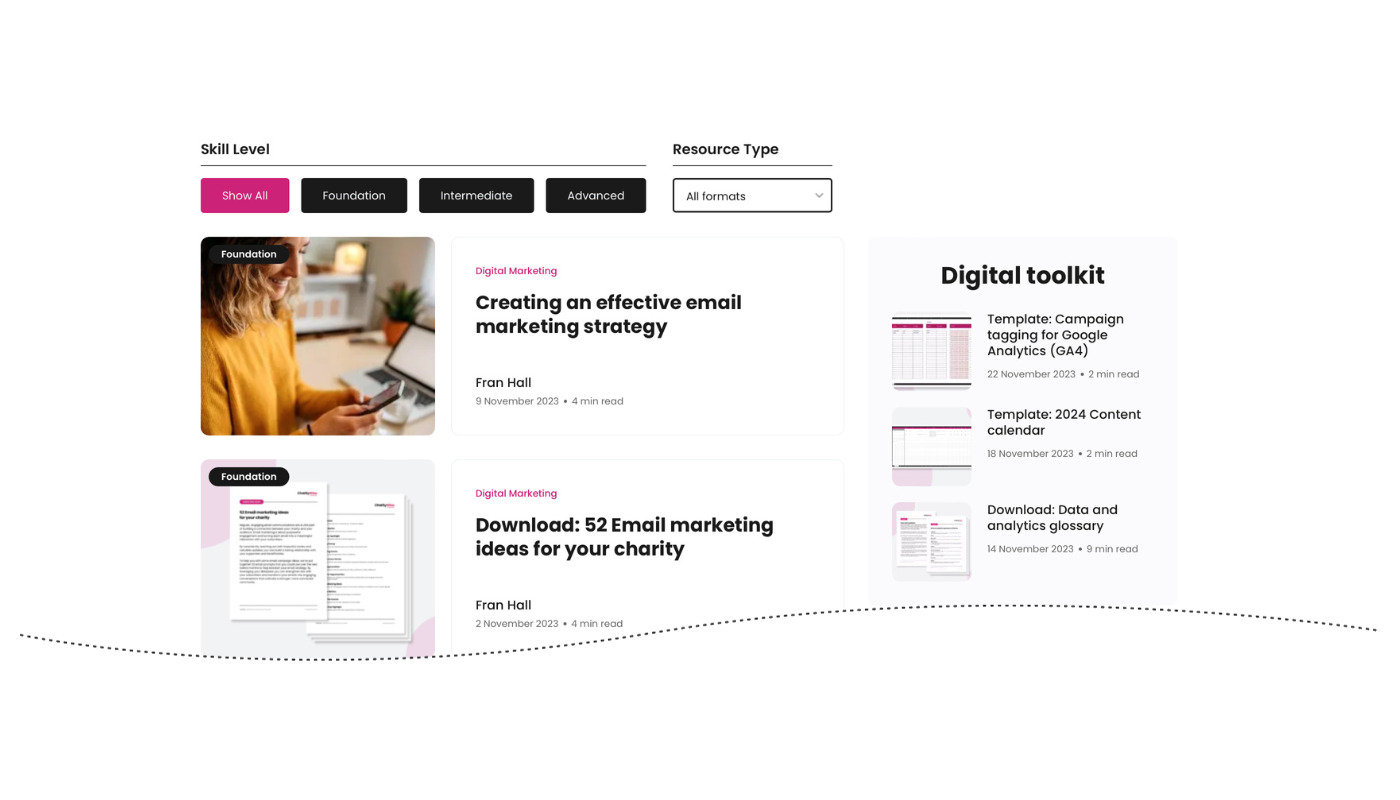
- Scroll down the page to find the filtering options (see image below)
- On the left-hand side of the screen, you can filter content by skill level
- Click on the ‘Foundation’, ‘Intermediate’ or ‘Advanced’ buttons to sort content based on your skill level
- You can then view the individual articles in each section
 Step 3 – Filtering by resource type
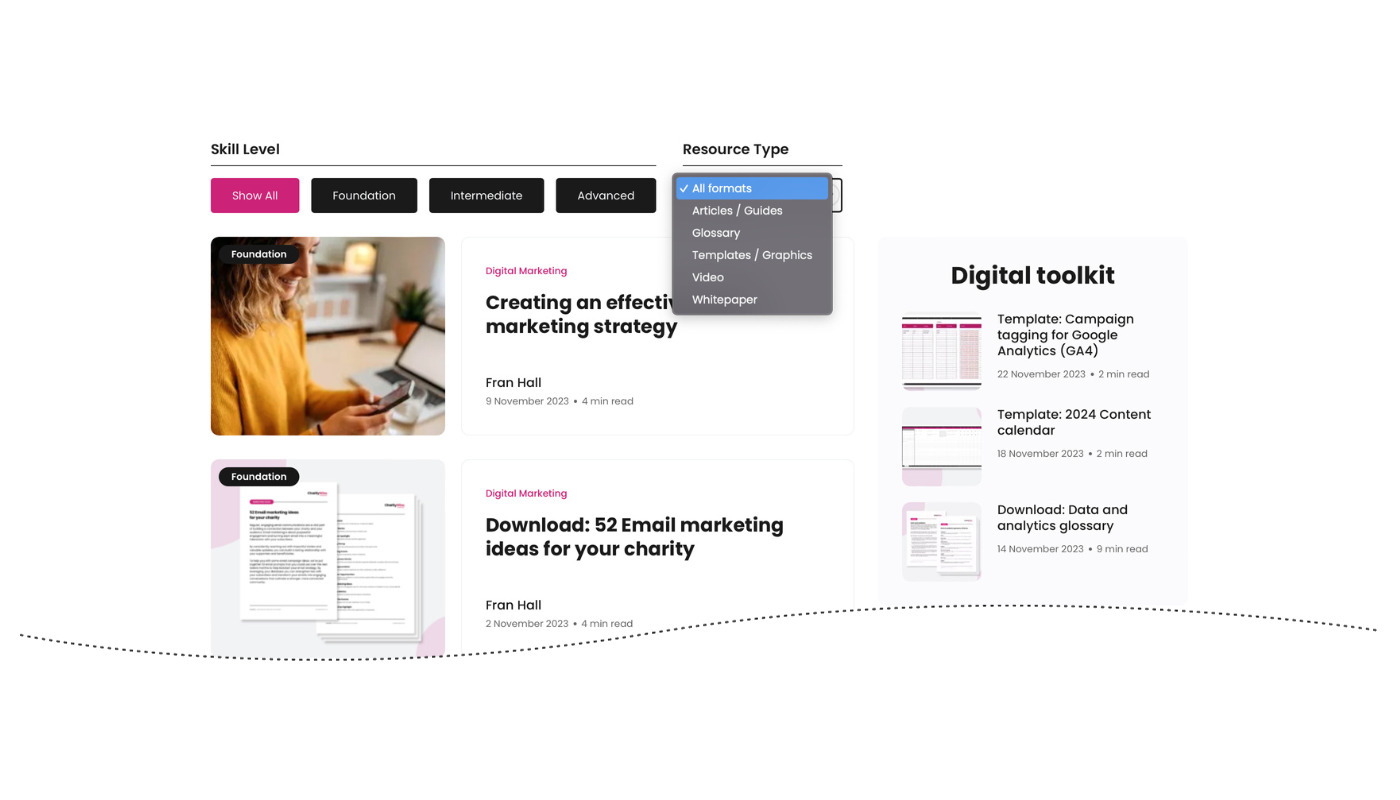
- On the right-hand side of the screen, you can filter content by resource type
- In the ‘All formats’ box, click on the arrow to display the content formats available
- Next, click on the content format of your choice (for example, ‘Articles/Guides’)
- You can then view the individual articles in each section
 Now you can get started with finding the right content to support your learning journey.
